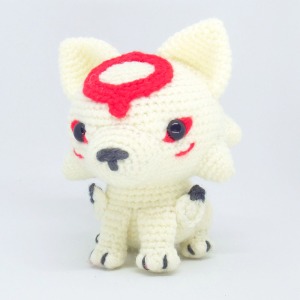
 More pictures and a downloadable PDF of the pattern are available on Ravelry.
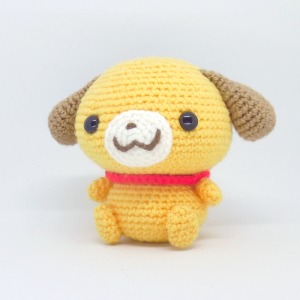
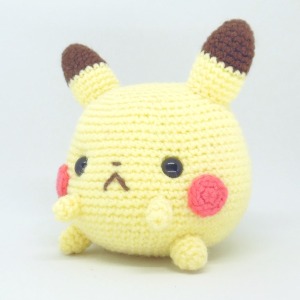
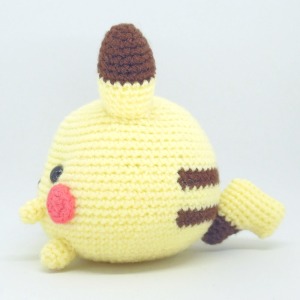
Heeey, apologies for the lack of patterns this month, but here’s a fancy one for FREE because I like not being sued by Disney. Also, in an attempt to have a more reliable schedule, I’ve decided Free Pattern Friday will be every other week. Regular patterns will be posted whenever they’re finished, as per usual. I’m also considering making “Mystery Pattern Monday” a thing where you have to figure out what you’re crocheting as you go. This is mainly an excuse for me not to take pictures but shhhhh.
Onto the actual pattern for this week. Outside of The Lion King I’m not a Disney person at all (if I’m honest Mickey and Minnie look a bit creepy to me); this was just made as a gift. There’s no Mickey pattern yet, but I’ll probably tweak this a bit and make it an upcoming Free Pattern Friday. The pattern itself is pretty straight-forward, there’s just a lot of pieces and a lot of sewing (my fingers hurt).
Final piece should measure about 6″ tall.
This is an icrochetthings original pattern © 2018. Do not claim as your own. Do not copy, sell, or distribute this pattern. Do not sell any products made from this pattern. Minnie Mouse belongs to Disney.
Materials
- DK weight yarn in black, cream, pink, white, yellow
- C hook (2.75 mm)
- Stuffing
- Scissors
- Tapestry needle
Head
Starting with cream
- ch 2, 6 sc in 1st ch (6)
- [inc] around (12)
- [sc, inc] around (18)
- [2 sc, inc] around (24)
- [3 sc, inc] around (30)
- [4 sc, inc] around (36)
- [11 sc, inc] around (39)
- [12 sc, inc] around (42)
- [sc] around (42)
- [sc] around (42)
Break off cream and attach black - [sc] around (42)
- [sc] around (42)
- [sc] around (42)
- [sc] around (42)
- [sc] around (42)
- [sc] around (42)
- [12 sc, dec] around (39)
- [11 sc, dec] around (36)
- [10 sc, dec] around (33)
- [9 sc, dec] around (30)
- [3 sc, dec] around (24)
- [2 sc, dec] around (18)
- [sc, dec] around (12)
- [dec] around (6)
F/O, sew shut
2 Cheeks
Starting with cream
- ch 2, 6 sc in 1st ch (6)
- [inc] around (12)
- [sc, inc] around (18)
F/O, leave long tail for sewing
Face Patch
Starting with cream
- ch 11, [sc] across (10)
- c1t, [sc] across (10)
- c1t, [sc] across (10)
- c1t, [sc] across (10)
- c1t, [sc] across (10)
- c1t, [sc] across (10)
- c1t, [sc] across (10)
- c1t, [sc] across (10)
- c1t, [sc] across (10)
- c1t, dec, 6 sc, dec (8)
- c1t, [sc] across (8)
- c1t, sc, hdc, sc, 2 ss, sc, hdc, sc (8)
F/O, leave long tail for sewing
2 Eyes
Starting with white
- ch 7, [sc] across, working on the opposite side of the chs: [sc] across (12)
F/O, leave long tail for sewing
Snout
Starting with cream
- ch 2, 6 sc in 1st ch (6)
- 3 inc, 3 sc (9)
- [sc, inc] three times, 3 sc (12)
- [2 sc, inc] three times, 3 sc (15)
- [3 sc, inc] three times, 3 sc (18)
- [4 sc, inc] three times, 3 ss (21)
- 18 sc, 3 ss (21)
- 18 sc, 3 ss (21)
F/O, leave long tail for sewing
Nose
Starting with black
- ch 2, 6 sc in 1st ch (6)
- [sc] around (6)
F/O, leave long tail for sewing
2 Ears
Starting with black
- ch 2, 6 sc in 1st ch (6)
- [inc] around (12)
- [sc, inc] around (18)
- [2 sc, inc] around (24)
- [3 sc, inc] around (30)
- [sc] around (30)
- [sc] around (30)
- [3 sc, dec] around (24)
- [2 sc, dec] around (18)
- [sc, dec] around (12)
- [dec] around (6)
F/O, leave long tail for sewing
2 Bow Pieces
Starting with pink
- ch 2, 2 sc in 1st ch (2)
- c1t, [inc] across (4)
- c1t, [sc, inc] across (6)
- c1t, [sc] across (6)
- c1t, sc, hdc, 2 ss, hdc, sc (6)
F/O, leave long tail for sewing
Body
Starting with pink
- ch 2, 6 sc inc 1st ch (6)
- [inc] around (12)
- [sc, inc] around (18)
- [2 sc, inc] around (24)
- [3 sc, inc] around (30)
- [4 sc, inc] around (36)
- [sc] around (36)
- [sc] around (36)
- [sc] around (36)
- [sc] around (36)
- [sc] around (36)
- [sc] around (36)
- [4 sc, dec] around (30)
- [sc] around (30)
- [sc] around (30)
F/O, leave long tail for sewing
Skirt
Starting with pink
- ch 36, ss in 1st ch to form a ring, [sc] around (36)
- [5 sc, inc] around (42)
- [sc] around (42)
- [6 sc, inc] around (48)
- [sc, hdc, dc, hdc, sc, ss] around (48)
F/O, leave long tail for sewing
Tail
Starting with black
- ch 13, [hdc] across (12)
F/O, leave long tail for sewing
2 Shoes
Starting with yellow
- ch 2, 6 sc in 1st ch (6)
- [inc] around (12)
- [3 sc, inc] around (15)
- [4 sc, inc] around (18)
- [sc] around (18)
- [sc] around (18)
- [sc] around (18)
- [sc] around (18)
- [4 sc, dec] around (15)
- [3 sc, dec] around (12)
- [dec] around (6)
F/O
2 Legs
Starting with black
- ch 6, ss in 1st ch to form a ring, [sc] around (6)
- [sc, inc] around (9)
- [sc] around (9)
- [sc] around (9)
F/O, leave long tail for sewing
2 Arms
Starting with white
- ch 5, [sc] across, working on the opposite side of the chs: [sc] across (8)
- [inc, 3 sc] around (10)
- [sc] around (10)
- [sc] around (10)
- ch 3, [hdc] across the chs, [sc] around (12)
- sc into the 1st sc of round 5, 2 sc, dec, 3 sc, dec (8)
Break off white and attach black - [BLO ss] around (8)
- [sc] around (8)
- [sc] around (8)
- [sc] around (8)
- [sc] around (8)
F/O, leave long tail for sewing
Assembly
- Use black yarn to embroider pupils on to the eyes
- Use white yarn to embroider shines onto the pupils
- Sew the eyes onto the face patch
- Use black yarn to embroider eyelashes onto the face patch
- Sew the face patch onto the head
- Sew the cheeks on either side of the face patch
- Sew the nose onto the tip of the snout
- Sew the snout onto the front of the head
- Use black yarn to embroider a mouth below the snout
- Sew the bow pieces onto the top of the head
- Use pink yarn to embroider a knot between the bow pieces
- Sew the ears on either side of the head
- Sew the skirt around the body
- Sew the tail onto the back of the body
- Sew the body onto the bottom of the head
- Sew the arms on either side of the body
- Sew the shoes onto the bottom of the legs
- Sew the legs onto the bottom of the body
Technically it’s just after midnight on Saturday but it’s still Friday somewhere so 😛
 More pictures and a downloadable PDF of the pattern are available on
 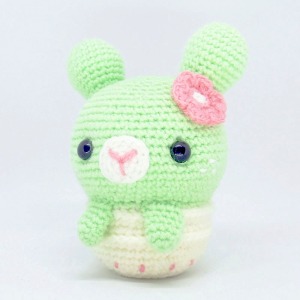 Potted bunny yay
 More pictures and a downloadable PDF of the pattern are available on
  More pictures and a downloadable PDF of the pattern are available on
 This is just a little update to my